Rainforest photography can be frustrating for one simple reason: there is often far less usable light than your eyes suggest.
Dense canopy blocks direct sunlight, shadows change constantly, and wildlife rarely stays still long enough for careful tripod work. A monkey may leap between branches, a bird can disappear behind leaves in seconds, and even a resting animal may move just enough to blur a photograph taken at too slow a shutter speed.
That makes camera settings especially important.
The goal is not to find one perfect combination and use it all day. Instead, you need a flexible setup that reacts quickly to changing light while still protecting the two things that matter most: sharpness and correct exposure.
For most wildlife photographers, the best camera settings for low-light rainforest photography rely on a fast enough shutter speed, a wide aperture, Auto ISO or carefully managed ISO, continuous autofocus, and a willingness to accept some noise rather than risk motion blur.
Start with shutter speed, not ISO
In dark forest, photographers often become overly concerned about keeping ISO low.
That usually leads to the wrong compromise.
A noisy sharp image is generally more useful than a clean image ruined by motion blur.
For wildlife, shutter speed should therefore be your first priority.
If the subject is relatively still, you may be able to work around 1/250 to 1/500 second, especially with image stabilization and good technique.
For active mammals or birds, a faster starting point such as 1/800 to 1/1250 second is often safer.
Fast-moving birds or animals jumping between branches may require 1/1600 second or faster.
These are starting points, not fixed rules.
Your subject’s movement, focal length, camera stabilization, and your own ability to hold the lens steadily all affect what is possible.
Use the widest practical aperture
Rainforest photography is one of the situations where fast lenses show their value.
A wide aperture allows more light to reach the sensor, which helps maintain shutter speed without forcing ISO even higher.
If your lens opens to f/2.8 or f/4, those apertures can be extremely useful.
Telephoto zooms with maximum apertures around f/5.6 or f/6.3 are still perfectly usable, but the camera may need to compensate with higher ISO.
There is one important trade-off.
A very wide aperture creates shallow depth of field.
That can beautifully separate an animal from a cluttered background, but it also makes focus accuracy more critical. With a close subject, the eye might be sharp while the nose or body falls noticeably out of focus.
When light allows, stopping down slightly to f/4, f/5.6, or beyond can give you more margin.
Auto ISO is often the most practical choice
Auto ISO is extremely useful in rapidly changing rainforest light.
A subject may move from a brighter clearing into deep shade within seconds.
If you’re adjusting ISO manually every time, you may miss the photograph.
One effective setup is:
- Manual exposure mode
- Shutter speed chosen for subject movement
- Aperture selected for available light and depth of field
- Auto ISO handling changing brightness
This gives you direct control over motion and depth of field while allowing the camera to adapt exposure quickly.
You can usually set an upper ISO limit if your camera allows it.
The appropriate ceiling depends on the camera.
Modern full-frame and APS-C bodies can often produce very usable files at ISO values that photographers would once have avoided entirely.
Don’t choose the limit based on a number alone.
Test your own camera and decide how much noise you are comfortable processing.
Don’t be afraid of high ISO
Rainforest wildlife photography frequently pushes ISO upward.
ISO 1600 may be routine.
ISO 3200, 6400, or higher can become necessary when working beneath heavy canopy, especially with moving subjects.
This is not automatically a problem.
Modern noise-reduction software can recover impressive detail from high-ISO RAW files.
Motion blur is much harder to fix.
The better approach is to expose properly at a higher ISO rather than deliberately underexpose at a lower ISO and brighten the image dramatically later.
Heavy underexposure can introduce ugly noise and reduce color quality.
Use the ISO you need to make the photograph.
Aperture priority can also work well
Manual mode with Auto ISO is not the only useful setup.
Aperture Priority can work well for slower rainforest photography, particularly landscapes, plants, perched birds, or animals that aren’t moving quickly.
Choose the aperture you want, then watch the shutter speed carefully.
The problem appears when the camera selects a shutter speed that is too slow for wildlife.
If your camera allows you to define a minimum shutter speed with Auto ISO, Aperture Priority becomes far more practical.
For unpredictable moving animals, though, many photographers prefer Manual mode with Auto ISO because it guarantees the shutter speed won’t suddenly fall too low.
Exposure compensation still matters
Auto ISO does not mean the camera always produces the exposure you want.
Rainforest scenes contain extreme contrasts.
A pale animal against dark foliage may cause the camera to overexpose highlights. A dark subject surrounded by bright leaves or sky can produce the opposite problem.
Exposure compensation allows you to correct this quickly.
In Manual mode with Auto ISO, many modern cameras still allow exposure compensation to adjust the ISO automatically.
Check your histogram and highlight warnings when there is time.
Bright patches of sunlight on fur, feathers, or leaves can clip very easily.
Protect important highlights without making the overall image unnecessarily dark.
Focus on the eye whenever possible
Autofocus has improved dramatically, but rainforest environments remain difficult.
Branches, leaves, vines, and foreground vegetation can confuse even sophisticated subject-detection systems.
Animal Eye AF or Bird Eye AF can be excellent when the subject is clearly visible.
However, be prepared to switch to a smaller focus area if the camera repeatedly locks onto leaves in front of the animal.
Continuous autofocus—often called AF-C or AI Servo—is generally the best choice for wildlife because it keeps updating focus as the subject moves.
For a stationary landscape or plant, single autofocus or manual focus may be easier.
The key is flexibility.
Rainforest photography rewards photographers who can change focus modes quickly without searching through menus.
Use burst mode, but don’t spray continuously
Burst shooting can increase your chances of capturing a sharp frame.
Even a perched bird moves its head. Primates blink, turn, and shift weight. Leaves may briefly block the subject.
Short bursts of three to five frames can be useful.
Continuous high-speed shooting for long periods usually creates unnecessary files and makes editing more difficult.
Watch the behavior first.
Shoot when the subject turns toward the camera, enters better light, or creates a clean composition.
Timing is more useful than simply filling the memory card.
Image stabilization helps, but it cannot freeze wildlife
In-body stabilization and lens stabilization are valuable in low light.
They reduce blur caused by your own hand movement.
That can allow slower shutter speeds for static subjects and environmental scenes.
However, stabilization cannot stop an animal from moving.
If a monkey moves its head while you photograph at 1/60 second, even excellent stabilization will not make the face sharp.
This distinction is crucial.
Use stabilization to control camera shake.
Use shutter speed to control subject movement.
Watch your focal length
Long telephoto lenses magnify both wildlife and camera movement.
At 400mm or 600mm, tiny movements become much more visible than they would at 100mm.
That means handheld photographers generally need more shutter speed at longer focal lengths, unless stabilization is particularly effective and the subject is stationary.
But don’t automatically zoom to the maximum focal length.
Rainforest environments often produce excellent wider compositions.
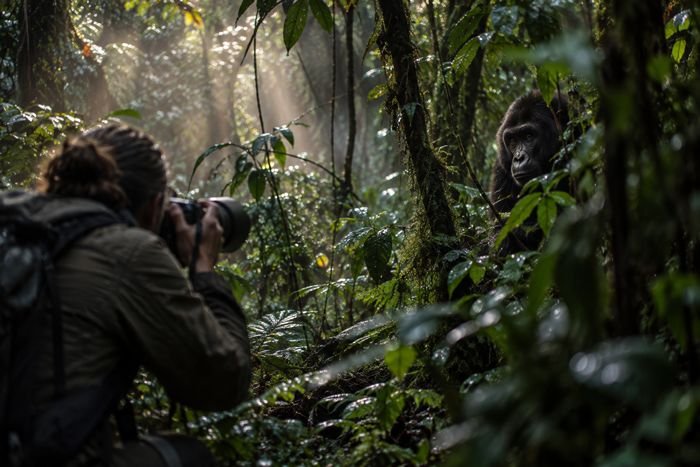
A gorilla surrounded by dense vegetation or a bird framed by giant leaves may tell a stronger story than a tightly cropped portrait.
A 70–200mm or 100–400mm lens can be particularly versatile when subjects appear at unpredictable distances.
Shoot RAW whenever possible
RAW files preserve much more information than standard JPEGs.
That matters enormously in rainforest conditions.
Dark shadows may need to be lifted, highlights recovered, white balance corrected, and noise reduced during processing.
RAW gives you more latitude for all of those adjustments.
JPEG can still work for travelers who want simple files with minimal editing, but photographers interested in maximum quality should strongly consider RAW or RAW+JPEG.
Make sure you have enough memory cards.
RAW files are substantially larger.
White balance can be surprisingly difficult
Rainforest light often has a strong green cast.
Light filtering through layers of leaves can make skin, fur, feathers, and tree trunks appear unnaturally green.
Auto White Balance usually provides a reasonable starting point, especially when shooting RAW.
You can then fine-tune color during processing.
Cloudy or Shade white balance may warm the image, but these presets can occasionally push the color too far.
Avoid obsessing over perfect white balance in the field if you are using RAW.
Concentrate on exposure, focus, and timing first.
Settings for rainforest landscapes
Not every rainforest photograph contains wildlife.
For wider forest scenes, waterfalls, giant trees, and vegetation, the priorities change.
You may use a slower shutter speed and lower ISO because the subject is largely stationary.
A starting combination might be:
- ISO 100–400
- Aperture around f/8
- Shutter speed determined by available light
- Tripod or stabilization if needed
For flowing water, deliberately slow shutter speeds can create motion blur.
Just remember that leaves also move.
A long exposure in windy forest can make the entire image look soft.
Rain changes both light and technique
Rain can improve rainforest photography.
Wet leaves become richer in color, reflections increase, and soft overcast light reduces harsh contrast.
The challenge is protecting equipment.
Use a rain cover or simple protective sleeve, keep a microfiber cloth accessible, and avoid changing lenses unnecessarily in heavy rain.
Condensation can also become an issue when moving between air-conditioned rooms or vehicles and humid outdoor conditions.
Give equipment time to acclimatize when possible.
Weather sealing helps, but it should never be treated as complete waterproofing.
A reliable starting setup for wildlife
If you want a simple baseline before entering the forest, try this:
- Manual exposure mode
- 1/1000 second
- Widest practical aperture
- Auto ISO
- Continuous autofocus
- Animal or bird eye detection
- Short burst mode
- RAW capture
- Image stabilization enabled when appropriate
Then adjust.
If an animal is sitting quietly and light is poor, reduce the shutter speed.
If a bird suddenly takes flight, increase it.
If depth of field is too shallow, stop down slightly and accept the resulting ISO increase.
Photography becomes much easier when settings respond to the scene rather than following a rigid formula.
Conclusion
Low-light rainforest photography is an exercise in compromise.
There is rarely enough light to have everything at once: very fast shutter speed, deep depth of field, and low ISO.
The priority should usually be sharpness.
Choose a shutter speed appropriate for the subject’s movement, open the aperture enough to gather light, and allow ISO to rise when necessary. Use continuous autofocus for wildlife, take advantage of eye detection when it works, and switch to a smaller focus area when vegetation confuses the camera.
Most importantly, don’t become so concerned about technical perfection that you miss the moment.
Rainforests are chaotic environments. Animals disappear behind leaves, sunlight changes by the second, and a photograph may exist for only a brief instant.
A sharp ISO 6400 image of rare wildlife in beautiful forest light is far more valuable than a perfectly clean frame you never captured.
For more safari photography advice, camera gear guides, and practical techniques for photographing wildlife across Africa‘s forests and national parks, continue exploring the WhySafari blog.
Frequently asked questions
Usually not for mobile wildlife because tripods can slow you down. They are much more useful for landscapes, waterfalls, plants, and situations where you can compose carefully.
Yes, especially with heavier telephoto lenses. It can reduce fatigue and improve stability while remaining easier to reposition than a tripod.
It can be useful for silent shooting, but fast movement and some lighting conditions may produce distortion or banding on certain cameras. Test your specific body before relying on it.
Avoid sudden temperature changes when possible. Keep equipment in its bag while moving from a cold, air-conditioned environment into humid air and allow it to warm gradually.
Flash policies vary by species, park, guide, and situation. It can disturb animals and may be prohibited, so never assume it is acceptable without checking local rules.
No. Full-frame sensors can offer advantages at high ISO, but modern APS-C and Micro Four Thirds cameras can produce excellent rainforest images with appropriate technique and lenses.
It can be useful for photographers who want autofocus control separated from the shutter button, but it is a preference rather than a requirement. Practice before the trip if you plan to use it.
Bring at least one or two charged spares for a full day, particularly if you use mirrorless cameras, stabilization, continuous autofocus, and frequent burst shooting.